
Help center / Queries and calculated fields
Queries and data
Queries and calculated fields
Queries decide which Salesforce data goes into your templates. Calculated fields let you add computed values and conditional text.
On this page
Create a query
Queries in Arimba use standard SOQL, so if you know Salesforce, you already know the syntax. For SOQL details, see the Salesforce documentation.
- Open the Arimba app from the App Launcher.
- Go to the Queries tab and click New.
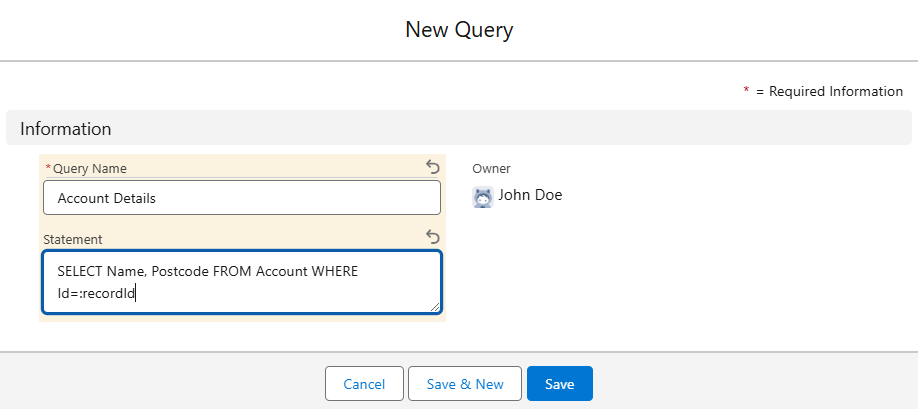
- Give the query a name that says which data it returns, for example “AccountDetails”. You use this name in your templates.
- Enter your SOQL query in the Statement field and save.
Data from the current record
End your query with WHERE Id=:recordId. Arimba then returns the data of the record the user is on when they generate the PDF:
SELECT Name, Postcode__c FROM Account WHERE Id=:recordIdIf a template always needs the same record, use that record’s Id in the query instead.
Data from related records
With curly brackets {…} you can use a field value of the current record inside a query on another object. That lets you reach data that is several steps away.
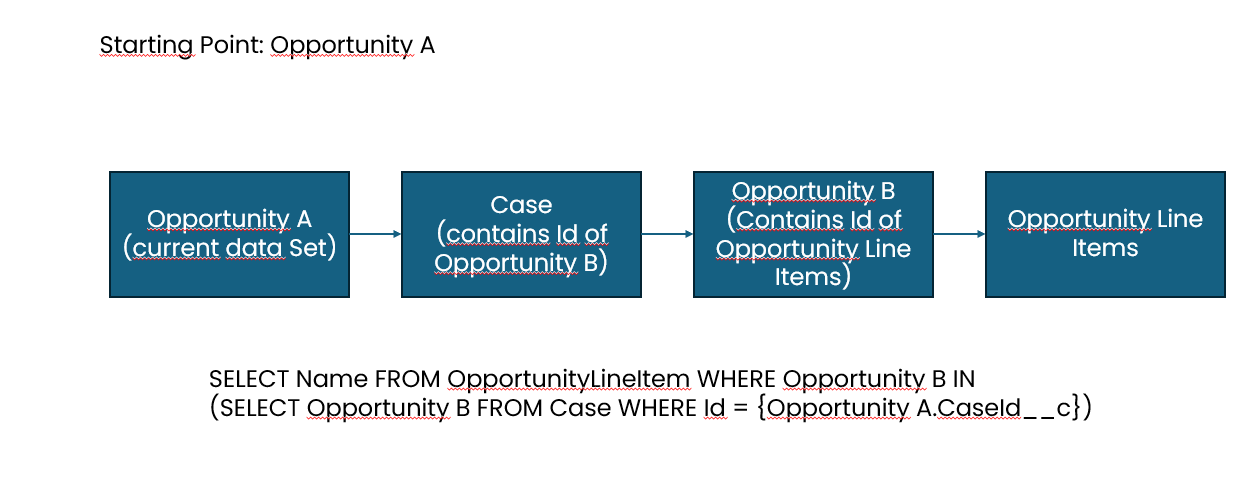
Example: you are on an Opportunity. A custom field CaseId__c points to a Case, and that Case points to a second Opportunity. To list the products of that second Opportunity, use:
SELECT Name FROM OpportunityLineItem WHERE OpportunityId IN
(SELECT OpportunityId__c FROM Case WHERE Id = {Opportunity.CaseId__c})
The expression in curly brackets reads CaseId__c from the current Opportunity. The query then finds the related Case and returns the line items of the Opportunity linked to it. [CHECK: the user guide names the Case field both Opportunity__c and OpportunityId__c]
Create a calculated field
Calculated fields put computed values into your template, for example the discount on an invoice or the number of items in an order. They can also show text depending on a condition.
- In the Arimba app, open the Calculated Fields tab and click New.
- Enter a name. It must always start with
Field., for exampleField.Discount. [CHECK: the user guide says a space is needed before and after the field; clarify where] - Enter the calculation under Formula, in JavaScript syntax, and save.
To use a Salesforce value in the formula, you need a query that returns it. Refer to the value like this:
Field.QueryName.OBJECTNAME_FIELDNAMEThis example uses the query “CaseTest” and shows a text only if the case has a name:
if (Field.CaseTest.CASE_NAME != "") {"The field contains a value";}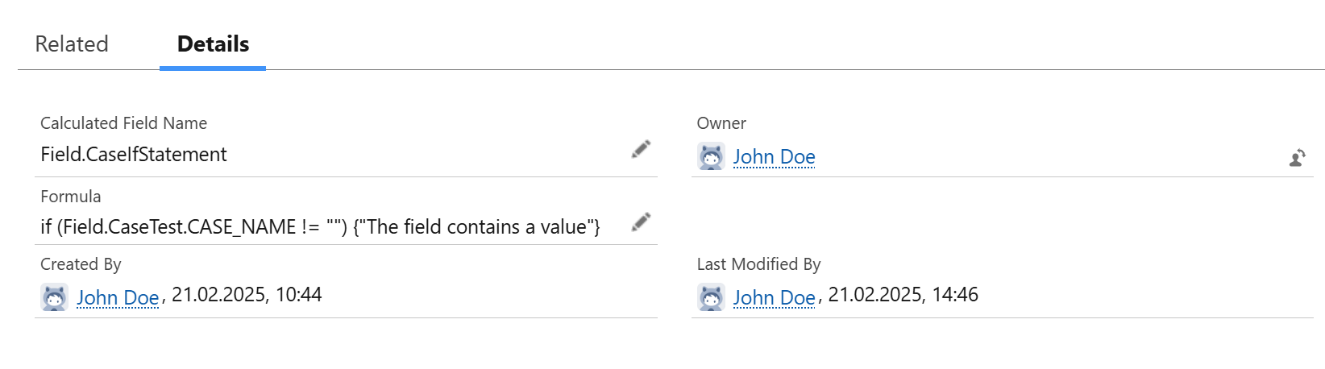
To use the calculated field, enter its name, here Field.CaseIfStatement, as the name of a form field in your template. See Templates and field syntax.
Stuck somewhere?
Send us a request with the support form and we’ll find a solution together.