
Help center / Getting started
Getting started
From installation to your first filled PDF
This guide walks Salesforce admins through the setup of Arimba, step by step. Follow the steps in order the first time. Afterwards, your users can generate filled PDFs from any record with a few clicks.
Before you start
- Administrator access to the Salesforce org where you install Arimba. We recommend starting in a sandbox.
- A PDF form you want to fill, for example an application or registration form your team fills by hand today.
- Adobe Acrobat with the form tools, to add form fields to your PDF. [ADD: or use the Arimba visual editor]
The steps at a glance
- Install Arimba
- Add the Arimba component to a record page
- Create a document set
- Create a query
- Prepare your PDF template
- Upload the template
- Generate your first PDF
1. Install Arimba
- Open the Arimba listing on AppExchange.
- Click Get It Now and log in to AppExchange.
- Choose where to install Arimba: production or sandbox.
- Accept the terms and conditions and click Confirm and Install.
- Choose the installation options and click Install.
2. Add the Arimba component to a record page
Users generate PDFs from a component on the record page. Add it to every object you want to create documents from, for example Account or Opportunity.
- Open any record of the object.
- Click the gear icon at the top right and choose Edit Page.
- Under Custom – Managed, find the documentGenerator component and drag it to the place you want on the page.
- Save and activate the page.
3. Create a document set
A document set works like a folder: it groups the PDF templates that belong to one process or area, so users find the right template quickly.
- Open the Arimba app from the App Launcher.
- Go to the Document Sets tab and click New.
- Give the document set a clear name, for example “Customer cases”, and save it.
4. Create a query
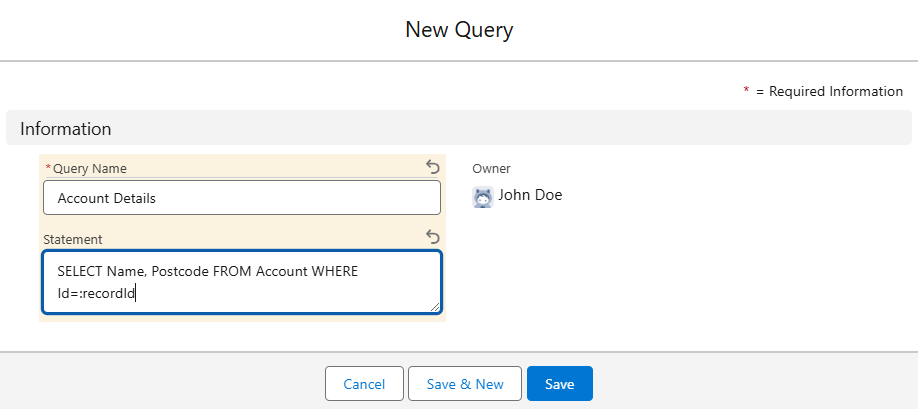
A query tells Arimba which Salesforce data to put into your template. Queries use standard SOQL, so if you know Salesforce, you already know the syntax.
- In the Arimba app, open the Queries tab and click New.
- Give the query a name that says which data it returns, for example “AccountDetails”. You use this name in your template later.
- Enter your SOQL query in the Statement field and save.
SELECT Name, Postcode__c FROM Account WHERE Id=:recordIdImportant: end your query with WHERE Id=:recordId. That way it returns the data of the record the user is on when they generate the PDF. For a fixed record, use its record Id instead.
5. Prepare your PDF template
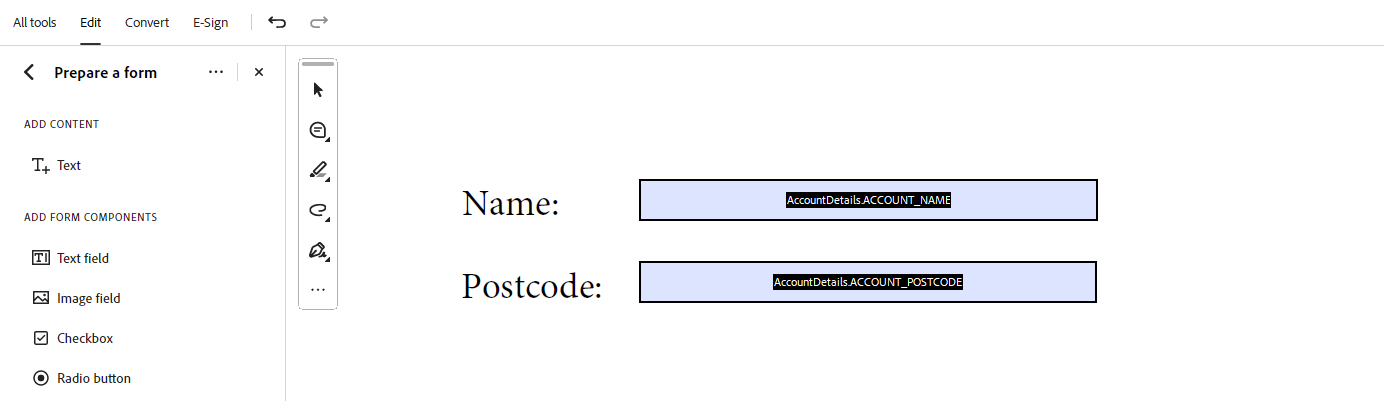
Open your PDF in Adobe Acrobat and use the form tools (Prepare a form) to add a text field wherever a value should appear. The name of each field decides which Salesforce value goes into it:
QueryName.OBJECTNAME_FIELDNAMEFor the query from step 4, the field names are AccountDetails.ACCOUNT_NAME and AccountDetails.ACCOUNT_POSTCODE. [CHECK: exact name for custom fields]
Important: field names are case-sensitive. Always write the object name and the field name in capital letters.
Fields from the current record, without a query
For values on the record itself, you don’t need a query. Use the master flag instead:
MASTER.OBJECTNAME_FIELDNAMEThis only works for fields that are available on the current record. For data from related records, use a query.
Tip: let long values fit
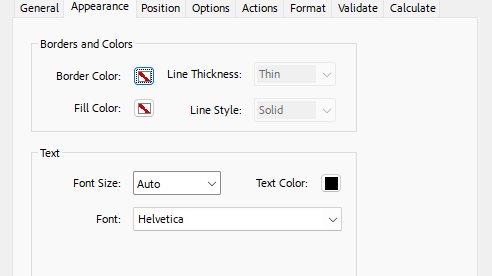
Values can vary a lot in length. In the form field’s properties, open the Appearance tab and set Font Size to Auto. Arimba then shrinks long values to fit the field instead of cutting them off.
When all fields are in place, save the PDF.
6. Upload the template
- Open the document set you created in step 3.
- In the Notes and Attachments section on the right, upload your PDF template.
The same list shows which templates the document set already holds.
7. Generate your first PDF
- Open a record whose page has the Arimba component.
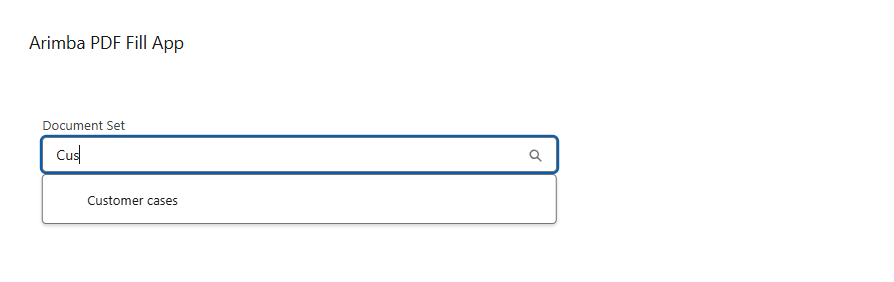
- In the component, select a document set from the list or search for it.
- Select the templates you want to fill. You can select several at once.
- Click Download PDF. A preview shows the values Arimba will use, so you can check that all data is there before you download.
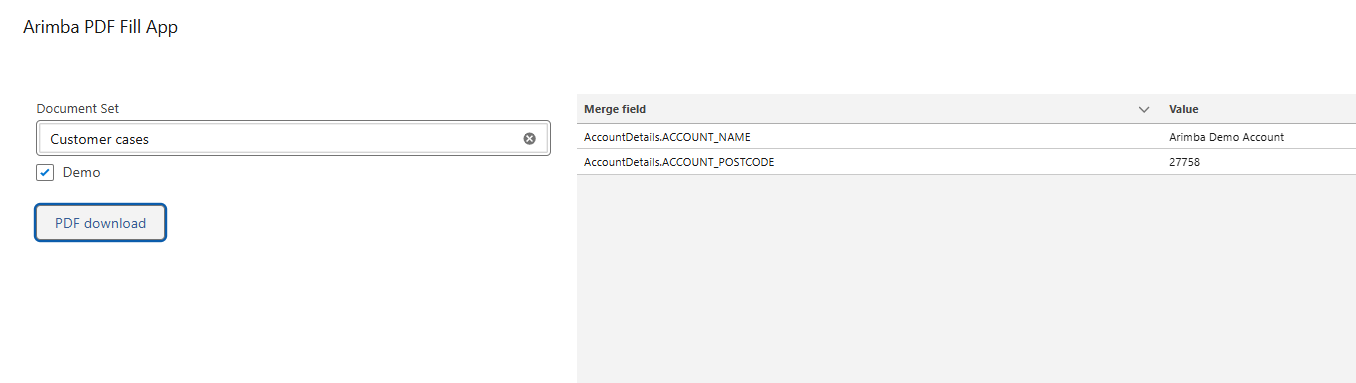
That’s it: your first PDF is filled with Salesforce data.
Next steps
Calculated fields
Add calculated values such as discounts or totals.
Formats and fonts
Control decimal places and change the font of a field.
Advanced queries
Pull data from related records across objects.
Stuck somewhere?
Send us a request with the support form and we’ll find a solution together.